
Welcome
SPL Meter has everything you need to make professional noise measurements in a variety of settings. You can vary the weighting and the averaging, see instantaneous and average readings side by side, work to a noise limit at a venue or an event, and save all of your readings and measurements for later.
Getting started
The quickest possible run through, from installing the app to a reading you can trust.
- Pick your English. The very first screen asks whether you want UK or US English. It only changes spelling, and you can change your mind later in Settings.
- Let the app hear. The first time you open it, SPL Meter asks for permission to use the microphone. It needs this to hear the sound you are measuring, so say yes. Without it there is nothing to meter.
- Calibrate. You will then be offered a shortcut straight to the Calibration screen. Take it if you can. Until the microphone has been calibrated, the meter shows you dBFS, which is a measurement of the sound against the full scale of the microphone rather than a real sound pressure level. It is fine to tap "Not now" and come back to it, but the numbers will not mean decibels until you do. See Calibration for the two ways of doing it.
- Point the phone at the sound. Hold it, or better still stand it somewhere sensible at the mix position, with the microphone pointing towards the PA and nothing in front of it. A hand cupped over the bottom edge of the phone will cost you several decibels.
- Read the big number. That is your sound pressure level, right now.
- Choose how you want to read it. In SPL Meter Pro, the weighting and response speed pickers under the readouts change what the number is measuring and how quickly it moves. A-weighted and Slow is the setting that matches most handheld meters, and is the one to start from if you are reading against somebody else's.
- Set your limits. If you have been given a noise limit, put it into Settings so the app can tell you when you cross it.
- Work to the average. For anything with a licence condition attached, move to the Compliance screen and press Start measurement when the show begins. That screen is the one that measures the sound in a way that complies with your licencing criteria.
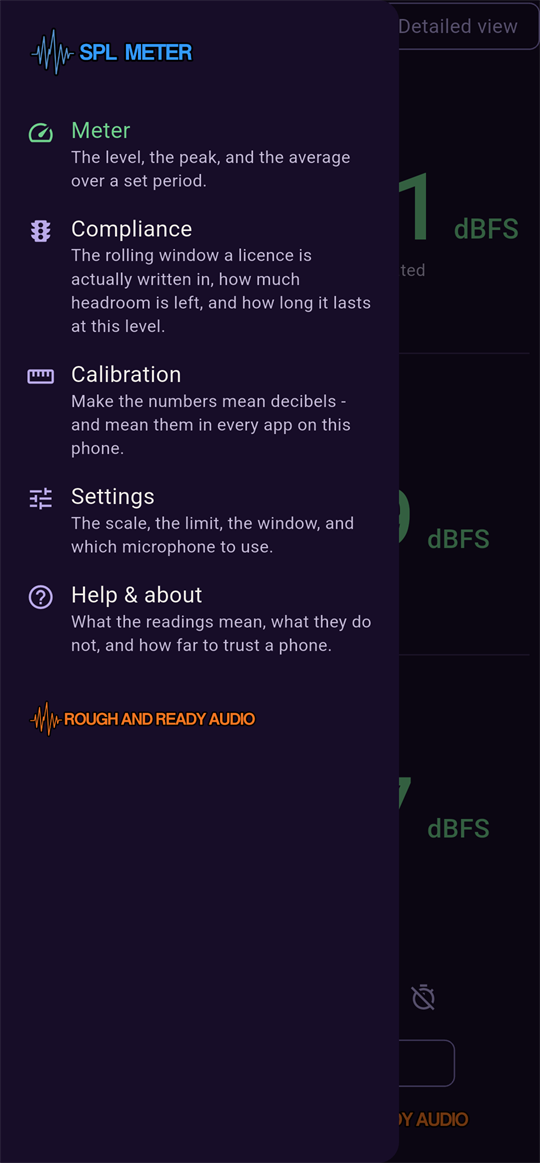
The menu button top left will let you navigate through the app's various screens.
Free and Pro
SPL Meter is free to download and free to use. Everything you need to take an honest, calibrated reading of a room is in the free app, with nothing held back and no trial period.
- SPL Meter gives you a live SPL readout, a full-height meter bar, and the whole of the calibration system. It runs A-weighted and Slow, which is the setting almost every handheld meter in the world is left on, so it can be read straight against one.
- SPL Meter Pro unlocks the detailed view with the peak and average readouts alongside the level, the weighting and response-speed pickers that come with it, the Compliance screen for working to a licence, per-reading alert limits, and session logging to a file.
The unlock is a single one-off purchase, not a subscription, and it applies to this app on this device. You will find it on a card at the top of the Settings screen, along with a Restore purchase button for when you reinstall or move to a new handset.
The meter will need recalibrated when you attach a new microphone, perhaps a USB-c microphone plugged into the phone. However calibrations are saved, so once each microphone or device is calibrated, you can change between the internal microphone and an external one and the app will recall and swap the calibration data to match.
The Meter screen
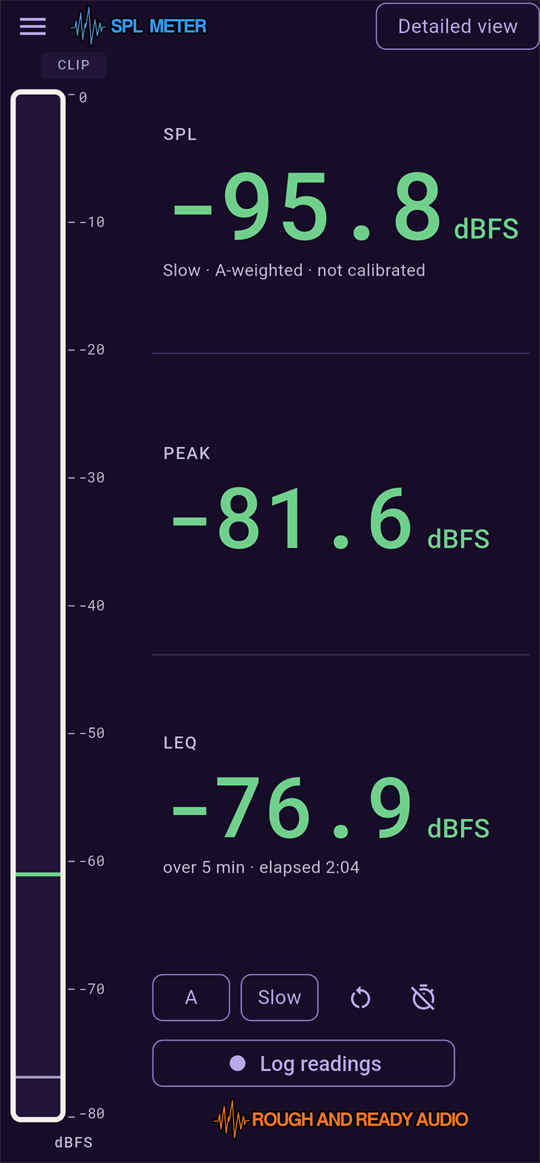
The main meter screen shows a meter bar running down the left-hand side of the screen, and sound level readings on the right. It fills the height of the screen either way up, with the readings stacked underneath each other in portrait and spread across in landscape.
The app opens in simple view, showing the current SPL on its own. A toggle at the top right switches you over: it reads Switch to detailed, and once you are there, Switch to simple. Detailed view shows you the SPL, the peak and the LEQ together, with the weighting and response-speed pickers underneath them. On the free app the toggle is still there, carrying a padlock, and tapping it explains what the detailed view adds.
The level, the peak, the average
- SPL
- The level right now, at whichever response speed is selected.
- PEAK
- A peak hold: the highest level seen in the last few seconds. It holds so you have time to read it, then lets go and follows the signal again. Pro
- LEQ
- The average level over a set period, five, ten or fifteen minutes, chosen on Settings, with how much of that window has elapsed shown alongside it. Pro
You can set a limit for any or all of these in Settings, and if that limit is crossed the reading turns red to let you know. Limits need a calibrated microphone to mean anything, so nothing turns red and no limit line is drawn on the bar until you have taken one. Each one is independent of the others. Pro
Weighting
A, C or Z, chosen with the picker beside the response speed. See Weighting, explained for what each is best suited for. If you are working to a noise limit, it is almost certainly A, and the free app is fixed there for exactly that reason. Pro
Response speed
This controls how fast the meter responds to sound, with the choices Fast, Slow, 4 s, 10 s and Infinite. Whichever you pick, the sound is averaged over that period before it reaches the display. Fast and Slow are the two you will find on any professional sound level meter, and mean an eighth of a second and one second respectively. We have added the longer ones to give you as much flexibility as possible in how you use the app. See How fast it follows for which to reach for when. Pro
Resets and logging
Two reset icons sit beside the pickers. One clears the peak, along with the highest point the bar is remembering. The other starts the averages again from zero, which is what you want after moving to a different part of the room.
The Log readings button underneath writes a reading-a-second file for whatever is currently on screen, from the moment you press it to the moment you press it again. In simple view that is one file; in detailed view it is three, one each for SPL, peak and LEQ. The event and venue names you set in Settings are written into every file, along with the date, the time and which microphone was in use, so a log you dig out six months later still says what it was. Pro
The Compliance screen
When you are working in venues or at live events, the noise limit criteria are almost never a single measurement. It is usually an average taken over a period of time, most often fifteen minutes. This screen reflects that and gives you a single number to follow, showing you whether you are within the noise limit or not. Pro
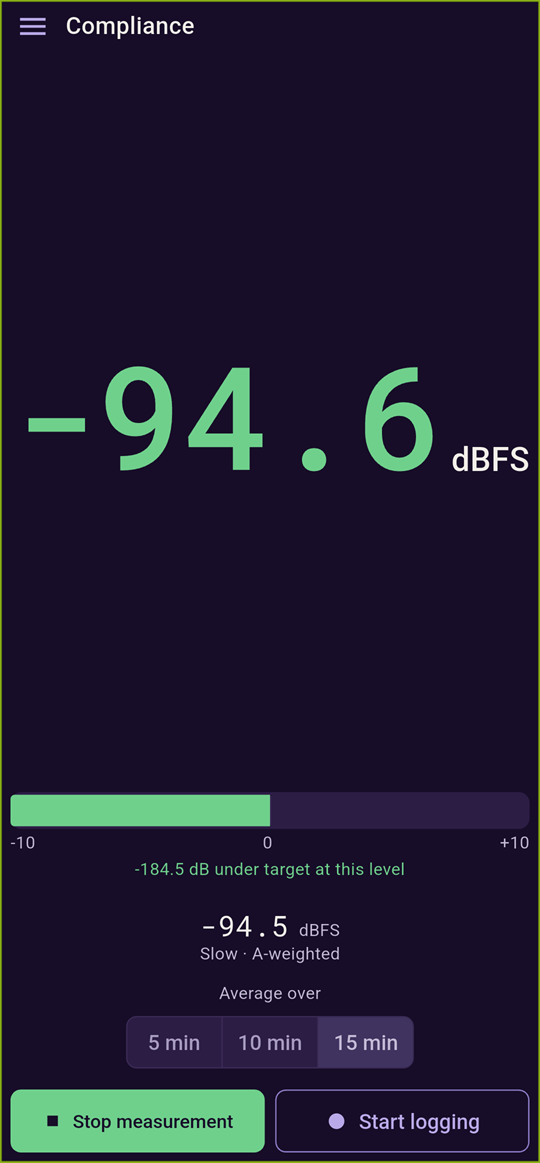
Pressing Start measurement will begin the measurement once your event starts.
The rolling window and a licence limit
Set the limit and the window length on Settings, then press start when you are ready to go. The sound is measured and averaged over the time period, and at the end of each period the average resets and starts again.
The window offers 5, 10 or 15 minutes, because those are the spans licence conditions are actually written in. The window locks while a measurement is running. Changing it halfway through would leave you looking at a figure measured over a span you are no longer using, so the screen asks you to stop, change it, and start again.
Headroom and time remaining
The bar under the main number is a prediction, and it is there to guide you and help you comply with the limit. The number underneath it is what the meter is reading just now and the bar tells you whether, if you were to stay at that level, you would still be inside your limit by the end of the averaging period.
- If the bar sits to the left and shows green, the sound playing just now is at a safe level. By the end of your averaging period it will not have taken you over your noise limit.
- If the bar sits to the right and shows red, it is telling you that even though you might not be over your limit right at this moment, this level is too loud for the amount of headroom you have left within the averaging time, and it will carry you over the limit by the time you reach the end of the averaging period.
Keeping the bar central and just slightly on the green side means you will be able to have your show or event as loud as possible while still staying just inside your noise limit.
You may notice that the bar moves around very quickly at the start of each averaging period. At that point there has only been a few seconds, or a minute or two, of data added to the average, so the volume you are playing at has a big effect on whether you are going to hit your target or not. As you move through the window and get closer to the end of that time period, there is already a lot of data in the average and your current level has much less effect on it, so the bar's movement slows down considerably.
Calibration
Calibration is what turns the app from something that shows you a number into something that shows you the truth. It is worth ten minutes of your time once, and then you rarely have to think about it again.
A microphone's sensitivity belongs to the handset, not to the app, so whatever you calibrate here is handed straight to every other Rough and Ready Audio app on the phone, and anything they have already calibrated is used here. Calibrate in SPL Meter and the other Rough and Ready apps are calibrated too.
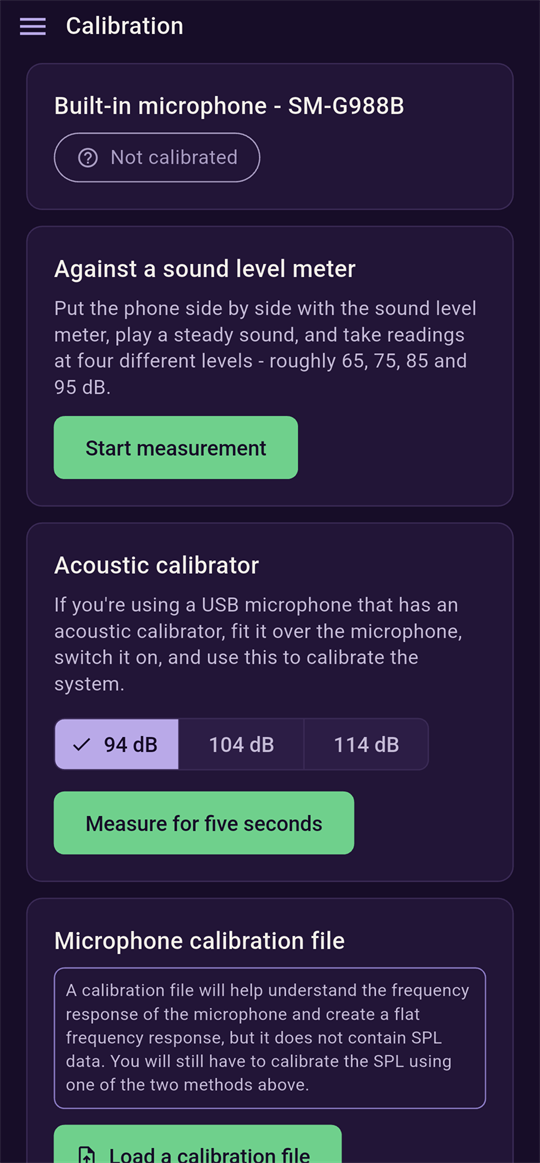
There are two ways to do it, and which one you use depends entirely on what you can get hold of.
- Against a sound level meter
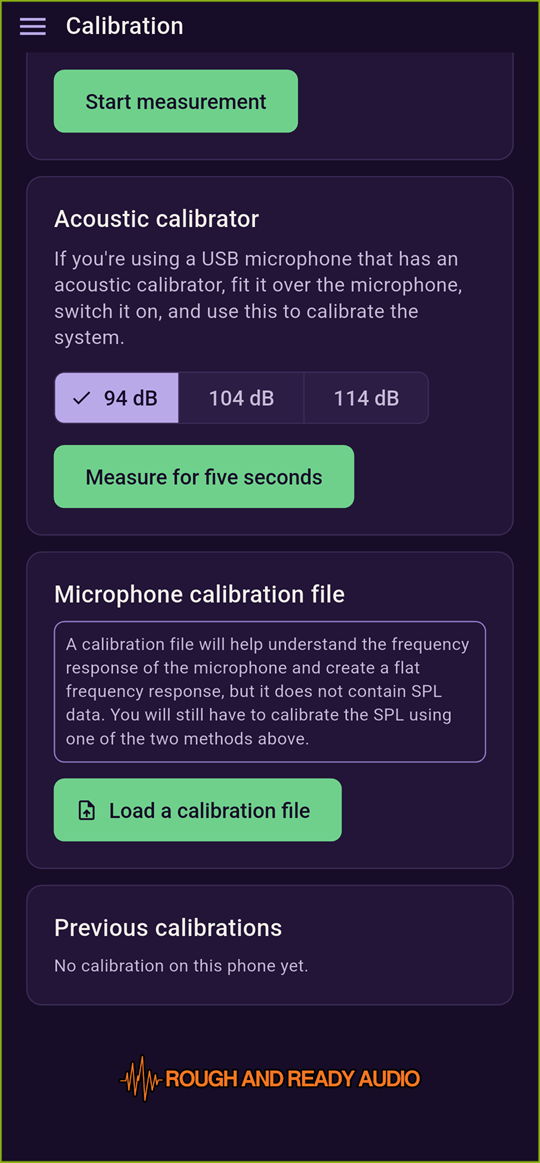
- The route most people will take. If you can use (or borrow) a sound meter you trust, even for an afternoon, this is all you need. The app walks you through the steps. First it asks you to confirm the reference meter is set to A-weighting, then you play a loud sound through a set of speakers, preferably something constant like pink noise or a Sine tone. Put the two microphones as close together as you sensibly can, and type into the phone what your matching sound meter says the level is. Turn the sound up some more and repeat, and do this a total of 4 times. Roughly 65, 75, 85 and 95 dB are good values to use, but all that matters is that you match the phone to what the sound level meter says at each of your four volumes. The software will then build a picture of how your microphone and phone hear sound and will calibrate the microphone.
- Acoustic calibrator
- The quick and precise route, if you have a USB measurement microphone and a calibrator that fits over it. Choose 94, 104 or 114 dB to match whatever your calibrator produces, fit it, switch it on, and let the app measure for five seconds.
Underneath those two, there are two more cards worth knowing about.
- Microphone frequency calibration file
- This loads a microphone's frequency response file, which lets an RTA flatten its display against that particular microphone's shape. It carries no level information at all, so it is not a substitute for an SPL calibration: a response file teaches an app the microphone's shape, not its level. You still need one of the two routes above.
- Previous calibrations
- One row per microphone this handset has calibrated, showing the most recent for each, with a delete button on each row. Delete one and that microphone goes back to reading dBFS until you calibrate it again.
Settings
- Language & region
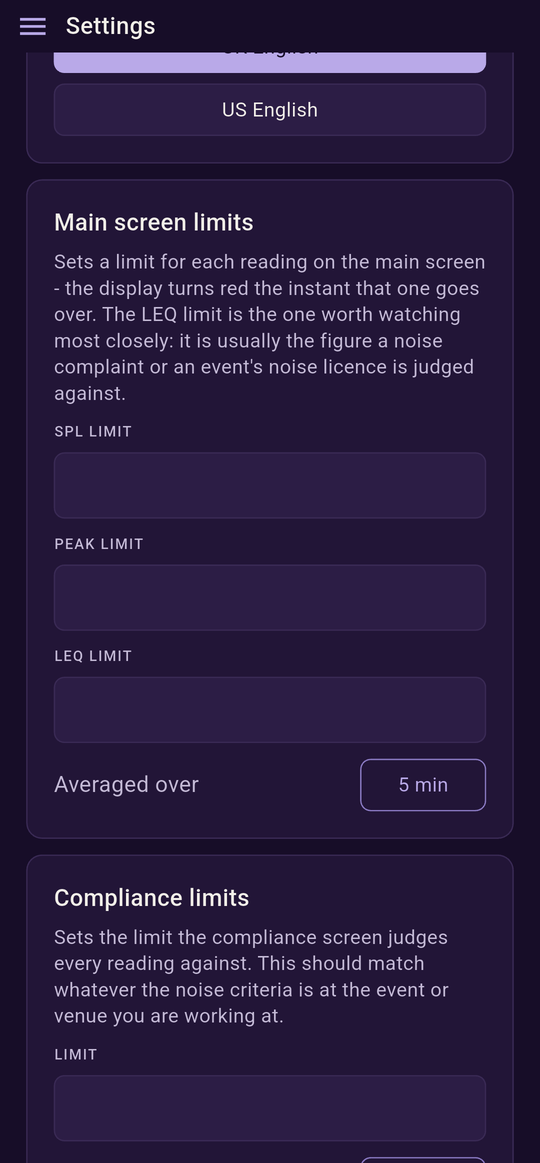
- UK or US English, for the whole app. This is the choice you made on first launch, and changing it here only affects spelling.
- Main screen limits
- A limit for each of SPL, Peak and LEQ on the Meter screen. The reading turns red the instant it goes over. The LEQ limit is the one worth watching most closely, because it is usually the figure a noise complaint or a licence is judged against. The averaging window for this LEQ is set here too: 5, 10 or 15 minutes. Pro
- Compliance limits
- The figure the Compliance screen judges every reading against, and the window it averages over: 5, 10 or 15 minutes. These are separate from the main screen limits above, because they answer a different question. See The compliance window. Pro
- Logging data
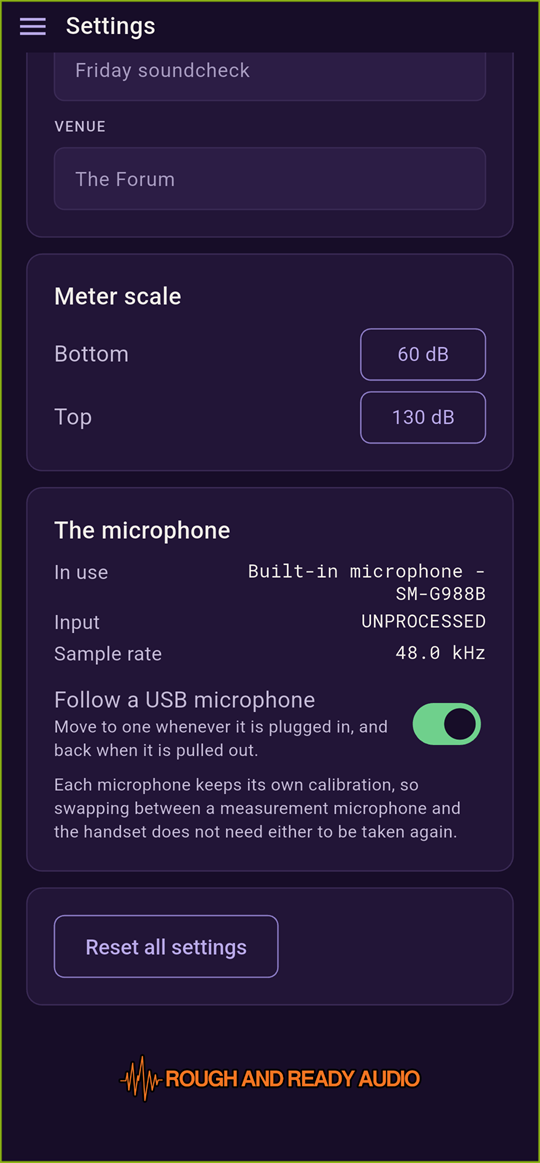
- An event name and a venue name, which get added to every file the Meter or Compliance screen logs. Everything else in the file, the date, the time and which microphone was listening, comes from the phone. Fill these in at the start of a job and your logs label themselves. Pro
- Meter scale
- The bottom and top of the meter bar's dB range. This is purely how the bar is drawn and has nothing to do with any limit or reading. If everything you do sits between 60 and 120 dB, setting the scale to match gives you a lot more useful movement out of the bar. It applies once the microphone is calibrated: until then the bar runs -80 to 0 dBFS instead, because a sound pressure scale has nowhere to put a dBFS reading.
- The microphone
- What is currently in use, its input path and sample rate, and a switch to follow a USB microphone automatically whenever one is plugged in, then go back to the built-in mic when it is pulled out. Each microphone keeps its own calibration, so you never have to redo one when you swap.
- Reset all settings
- Puts everything on this screen back to its default. Your calibration is deliberately left alone. It is a measurement of a microphone rather than a preference, and it belongs to every app on the phone rather than just this one.
Understanding your readings
None of this is necessary to use the app, but it is the background that makes the numbers worth something. If you have ever wondered why two meters pointed at the same PA disagree, the answer is almost always somewhere in this section.
The three numbers
SPL is the level right now, shaped only by the response speed you have chosen. It is the number you watch while you mix.
PEAK is a hold rather than a running maximum. It catches the highest level of the last few seconds, shows it to you long enough to be read, then lets go and follows the signal down again. That is deliberate: a maximum that only ever went up would tell you what happened once, an hour ago, and nothing about now.
LEQ is an average over a fixed period, which you choose in Settings. Because the period is fixed, the number settles to something that means something on its own. An average that simply ran for as long as the app happened to be open would keep drifting and would never be comparable to anything.
Weighting, explained
Weighting is an EQ curve applied to the sound before it is measured, so that the figure reflects something specific rather than everything equally.
- A
- The Fletcher-Munson equal-loudness curve for quiet sound. The ear barely hears bass at low levels, so this rolls the bottom end away to match. It is the one to set for noise compliance work, because that is what almost every noise limit is written in.
- C
- The same idea at high levels. Loud sound is heard much more evenly across frequency, so this stays nearly flat down to 20 Hz. Reach for it when the low end is what you are interested in.
- Z
- Flat. No weighting at all. This is the one to tune a system on, because it shows you what the PA is actually doing rather than what an ear makes of it, It is the one to reach for when you are tuning rather than reporting.
How fast it follows
- Fast
- 125 milliseconds, as the IEC 61672 standard defines it. Quick enough to follow a snare hit. Use it when you want to see what the system is actually doing rather than what it averages out to.
- Slow
- One second, again as the standard defines it. This is what a handheld meter is almost always left on, so it is the setting to match when you are reading against somebody else's.
- 4 s and 10 s
- A flat average over the last four or ten seconds. Steady enough to read from across a room, and long enough to ride out a quiet verse without chasing every syllable of a vocal.
- Infinite
- An average of the sound taken since the last reset, and never cleared on its own. Sound and music at events naturally has loud and quiet sections, averaging the sound over a period of time gives you a much better idea of what the overall level is throughout the duration of the event.
The compliance window
The rolling average on the Compliance screen is a different figure from the LEQ readout on the main screen, even when you have set both to the same length.
The main screen LEQ is one of three numbers on a screen built for general monitoring, and it runs continuously from whenever the app happened to launch. The Compliance figure is the one a licence is actually judged against. It sits on its own screen with nothing competing for your attention, and it only starts counting when you press Start measurement. Two different jobs, so two different numbers.
Two weightings at once
The Compliance screen always judges in A-weighting, whatever the Meter screen happens to be set to, because that is what a licence condition is almost always written in.
This is more useful than it sounds. It means you can leave the Meter screen on C-weighted to keep an eye on the low end while you tune the system, while the Compliance screen carries on tracking the real dBA figure the licence cares about. Both at once, with no switching back and forth and no risk of reporting the wrong one.
What the numbers are not
Even calibrated, this is a phone microphone. Matched against a good reference it will give you a genuinely useful reading, and for the everyday job of keeping a show inside its limit it is more than good enough. It is not a substitute for a Class 1 or Class 2 instrument in the situations where a measurement has to carry legal weight of its own. If somebody is going to court over a number, that number needs to come from a certified meter.
Troubleshooting
The reading says dBFS, not dB
Nothing has calibrated this microphone yet. Go to Calibration and run a calibration, either against a sound level meter or with an acoustic calibrator. It is also worth checking whether another Rough and Ready Audio app on this phone has already done it, since a calibration is shared across all of them.
The number seems to be moving faster than the response speed I chose
It should not be. The digits update once per period at whichever speed is set, so a 4 s setting should visibly hold and then step rather than crawling continuously. If it still looks wrong, check which part of the screen you are watching: the meter bar always animates at full rate so that it moves smoothly, which is expected. It is the SPL, PEAK and LEQ digits that step in time with the setting.
Compliance says "No limit set"
Set a limit in Settings, under Compliance limits. The window length is chosen there too, and both lock once a measurement is running, so stop it first if you need to change either.
A USB microphone is not being picked up
Check that "Follow a USB microphone" is switched on in Settings. With it on, the app moves to a USB mic automatically when you plug one in, and back to the built-in one when you unplug it. If it is still not being picked up, it must be the phone's operating system that is not picking it up, rather than the app specifically.
The readings are noticeably lower than the meter beside them
Check what is in front of the phone's microphone. A case, a hand, a pocket or a table top will all cost you level, and the microphone is usually on the bottom edge. It is also worth confirming both meters are on the same weighting: A against C on a system with subs can differ by a very large margin.
FAQ
Does calibrating in this app calibrate the RTA and Sub Array Designer too?
The SPL calibration, yes. It is shared across every Rough and Ready Audio app on the phone, because it is keyed to the microphone rather than to the app. A microphone frequency response file is a separate thing: that shape is used by the RTA to flatten its display, and has no effect on this app's SPL figure.
Why does Compliance ignore the weighting I picked on the Meter screen?
By design, and it is a feature rather than an oversight. See Two weightings at once. A licence condition is almost always written in dBA, so Compliance always judges in A-weighting no matter what the Meter screen is showing at the time.
What is the difference between the main screen's LEQ and the Compliance window?
They can be set to the same length, but they are different figures for different jobs. See The compliance window. The main screen LEQ is a rolling average of the last 5, 10 or 15 mins; the Compliance figure is the one a licence is judged against, and while it is also an average number, it resets after every 5, 10 or 15 mins rather than continuously rolling.
Can I log from the Meter screen and the Compliance screen at the same time?
Yes. Each screen's log button starts and stops its own file independently. In practice there is rarely much point, since the Compliance log already carries the figure that matters for a licence.
Is the Pro unlock a subscription?
No. It is a single one-off purchase for that app on that device, and there is a Restore purchase button on the same card for when you reinstall or change handset.
Do I need to recalibrate every time I use the app?
No. A calibration is stored per microphone and stays until you delete it. It is worth redoing occasionally, and worth redoing straight away if you change phone, but it is not a per-show job.
Glossary
- dBFS
- Decibels relative to full scale. What an uncalibrated reading is measured in: a fraction of the microphone's own headroom rather than a sound pressure.
- dB SPL
- Decibels of sound pressure. What a calibrated reading becomes, and the only kind of reading a licence limit means anything against.
- LEQ
- Equivalent continuous level. The average sound energy over a stated period, expressed as the steady level that would have delivered the same total energy.
- Peak hold
- The highest level seen recently, held on screen long enough to be read before letting go and following the signal again.
- Time weighting
- How quickly the reading responds to a changing signal. Fast is 125 ms and Slow is 1 second, as IEC 61672 defines them.
- Frequency weighting
- A curve applied to the signal before it is measured, so the figure reflects how a human ear responds across frequency (A and C), or nothing at all (Z).
- Free field
- An idealised space with no reflections or boundaries. Real rooms are not free fields, which is part of why two meters in different places disagree.